
Flatgeobuf is a stable library and offers detailed examples on its use. In one example from their website, we can see it being used to filter a large dataset by bounding box. This example shows how you can use it to stream large datasets without the need for anything more complex than a file server in its support. In this post, we expand on that example by providing a working extension to the Source component in react-map-gl that manages a Flatgeobuf file. Often, we use wrappers in web mapping applications to handle complex actions including dynamic layer ordering through React’s component lifecycle, and this post will let you continue on such a path while using Flatgeobuf as a data source.

⚠️ In order to make best use of this post, you will need a basic understanding of Node JS with NPM, Mapbox GL JS, React, as well as react-map-gl.
If you want to skip to the finished product, have a look at this codesandbox to see how this product is made.
Wrappers: Use Early, Use Often
Using a wrapper with mapping libraries is a strong long-term solution in the endless fight against tech debt. Wrappers in the JS mapping world are specialized tools that abstract away the challenges of rendering, updating and ordering map layers by allowing the developer to treat them like any JSX component. Often when starting web mapping projects, developers have the urge to just “go with” the mapping library instead of using a wrapper. But the problem is similar to when many individuals choose vanilla JavaScript over an existing framework: Given enough time, they’ve now created their own framework that they’re now responsible for, including all the edge cases.
When it comes to wrapping Mapbox GL JS and Maplibre, I find that react-map-gl is sufficiently robust in that it always allows me to do what I need it to do, and it has yet to fail my work. So I try to use it whenever I suspect there will be more than a couple layers in a given map, which is almost always.
Get Started: Implement Flatgeobuf in react-map-gl
In this tutorial, we’re going to use Vite. You’re going to want a recent version of NPM. I use asdf as my version manager, and many other people use nvm. It’s always a good practice to work with the latest LTS version of Node on your working computer at a minimum.
Step 1: Create a new project .
To start, we are going to create a new project using vite, a build chain with some similarity to Create React App. Here’s how we get started:
npm create vite@latest flatgeobuf-vite  -- --template react
cd flatgeobuf-vite && npm i flatgeobuf mapbox-gl react-map-gl
At this stage, we’ve created a new React app in the flatgeobuf-vite directory and have installed the following dependencies:
- Mapbox GL JS
- Flatgeobuf
- react-map-gl
Step 2: Get a Mapbox GL token.
If you have a Mapbox account, all you need to do is go to https://account.mapbox.com to retrieve a Mapbox API token. This allows us to use the Mapbox GL JS library, and access the Mapbox base maps. For many people who do not lean on Mapbox heavily, this service is free, so if you don’t have an account, you should give it a try.
You’ll find a default public token on this page. Retrieve it and save it for later. You can also create tokens with limited scopes (such as where they can be used) so that others are not able to use it.
Step 3: Carve out a GeoJSON map
Flatgeobuf comes with a method that allows us to convert streamed flatgeobuf (fgb) content to GeoJSON, which means we should treat the layer’s source as GeoJSON. So to get started, it makes sense to just use a GeoJSON source, and that is what we’ll do:
// components/DemoMap.jsx
import Map, { Source, Layer } from "react-map-gl";
import "mapbox-gl/dist/mapbox-gl.css";

const geoJSON = {
  "type": "FeatureCollection",
  "features": [
    {
      "type": "Feature",
      "properties": {},
      "geometry": {
        "coordinates": [
          [
            [
              -3.8926439855934234,
              0.9491437571926014
            ],
            [
              -3.8926439855934234,
              -2.70151617207533
            ],
            [
              0.6662127138984317,
              -2.70151617207533
            ],
            [
              0.6662127138984317,
              0.9491437571926014
            ],
            [
              -3.8926439855934234,
              0.9491437571926014
            ]
          ]
        ],
        "type": "Polygon"
      }
    },
    {
      "type": "Feature",
      "properties": {},
      "geometry": {
        "coordinates": [
          [
            [
              0.7474975532038854,
              -2.6415940151777733
            ],
            [
              0.7474975532038854,
              -5.490600498004824
            ],
            [
              3.6375509545929674,
              -5.490600498004824
            ],
            [
              3.6375509545929674,
              -2.6415940151777733
            ],
            [
              0.7474975532038854,
              -2.6415940151777733
            ]
          ]
        ],
        "type": "Polygon"
      }
    }
  ]
}


const mapToken = "TOKEN GOES HERE";


// For more information on data-driven styles, see https://www.mapbox.com/help/gl-dds-ref/
export const fillLayerStyle = {
  id: "data",
  type: "fill",
  paint: {
    "fill-color": "#3288bd",
    "fill-outline-color": "#fff",
    "fill-opacity": 0.8,
  },
};

function DemoMap() {
  return (
    <div className="w-screen h-screen">
      <Map
        style={{ width: "100vw", height: "100vw" }}
        mapStyle="mapbox://styles/mapbox/streets-v9"
        initialViewState={{
          longitude: 0,
          latitude: 0,
          zoom: 9,
        }}
        mapboxAccessToken={mapToken}
      >
        <Source id="my-data" type="geojson" data={data}>
          <Layer {...fillLayerStyle} />
        </Source>
      </Map>
    </div>
  );
}

export default DemoMap;
This will give you the base of the map, and will be the first step towards building a Flatgeobuf source component.
Step 4: Create a Flatgeobuf Source React Component
This is the meat of the tutorial. We’re going to create a new file called FlatgeobufSource.jsx in the components directory, and we’re going to assemble the parts required to stream the data. The first part is to create a component that takes in a url and children prop and returns just the children:
import React from 'react'

function FlatgeobufSource({children, url}) {
  return (
    <>{children}</>
  )
}

export default FlatgeobufSource
Step 5: Create a function which retrieves the map’s bounds
To make this happen, we are going to need access to the map object, which users of Mapbox GL JS know well. We access this here by using the useMap React hook provided by react-map-gl, and we use this to create a function that retrieves the bounds of the map on-demand:
 // components/FlatgeobufSource.jsx

  import { useMap } from 'react-map-gl'

  function FlatgeobufSource({children, url}) {
    const { current: map } = useMap()

    function retrieveBounds() {
      const [[minX, minY], [maxX, maxY]] = map.getBounds().toArray();
      return {
        minX,
        maxX,
        minY,
        maxY,
      };
    }

    return (
      <>{children}</>
    )
  }
Step 6: Use That Function to Retrieve and Deserialize the Streamed Data
In order to stream our data, we need both the source url, as well as the bounds of our search. Now that we have something that gives us our bounds, we are able to create the streaming function:
// components/FlatgeobufSource.jsx

  import { useMap } from 'react-map-gl'

  function FlatgeobufSource({children, url}) {
    const { current: map } = useMap()
    import { deserialize } from "flatgeobuf/dist/flatgeobuf-geojson.min";

    function retrieveBounds() {
      const [[minX, minY], [maxX, maxY]] = map.getBounds().toArray();
      return {
        minX,
        maxX,
        minY,
        maxY,
      };
    }

    async function loadData() {
      const bounds = retrieveBounds()
      const iterable = deserialize(url, bounds);

      let i = 0;
      const featureClass = generateFeatureClass();

      for await (let feature of iterable) {
        featureClass.features.push({ ...feature, id: feature.properties?.id ?? i });
        i += 1;
      }
      return featureClass;
    }

    return (
      <>{children}</>
    )
  }
Here, the deserialize function returns an async iterator that requires us to iterate over every feature that is streamed. In this code block we are also using the index of the stream iteration for creating an id attribute in the geojson object as a backup, in case one isn’t provided in the data. Ideally, you want to use the canonical id attribute for the feature class, especially if you seek to use features in this layer for any interaction. But sometimes, sloppy data management will not yield an id attribute, which is why you will want a backup.
Step 7: Put the Data Together to Create a Source of Truth
For using this function in a React component, we’re going to do one more thing: We’re going to employ the useState hook, and instead of returning the feature class, we’ll update the state at the end of the function instead:
// components/FlatgeobufSource.jsx

import { useMap } from 'react-map-gl'
import { useState } from \'react\'

export function FlatgeobufSource({ children, url }) {
  const { current: map } = useMap();
  const [data, setData] = useState(generateFeatureClass());

  function retrieveBounds() {
    const [[minX, minY], [maxX, maxY]] = map.getBounds().toArray();
    return {
      minX,
      maxX,
      minY,
      maxY,
    };
  }


  async function loadData() {
    const bounds = retrieveBounds()
    const iterable = deserialize(url, bounds);

    let i = 0;
    const featureClass = generateFeatureClass();

    for await (let feature of iterable) {
      featureClass.features.push({ ...feature, id: feature.properties?.id ?? i });
      i += 1;
    }
    setData(featureClass);
  }

  return (
    <>{children}</>
  )
}
Step 8: Add Hooks and Map Events
Now we’re ready to create triggers for the map to load Flatgeobuf from the remote source. There are two times we seek to retrieve the data:
- Once, when the map initially loads
- Multiple times, whenever the map moves
We’re also going to only want to do this when the React component mounts, as opposed to every time it renders. For this part, we’re going to employ the useEffect hook:
  useEffect(() => {
    map.once("load", loadData);
    map.on("moveend", loadData);

    return () => {
      map.off("moveend", loadData);
    };
  }, []);
This hook does three things:
- When the map initially loads, it triggers loadData once
- Each time the map finishes a move, it triggers loadData
- When the component unmounts, it removes the listener invoked in 2.
// components/FlatgeobufSource.jsx
import { useMap } from 'react-map-gl'
import { useState } from 'react'
export function FlatgeobufSource({ children, url }) {
const { current: map } = useMap();
const [data, setData] = useState(generateFeatureClass());
function retrieveBounds() {
const [[minX, minY], [maxX, maxY]] = map.getBounds().toArray();
return {
minX,
maxX,
minY,
maxY,
};
}
async function loadData() {
const bounds = retrieveBounds()
const iterable = deserialize(url, bounds);
let i = 0;
const featureClass = generateFeatureClass();
for await (let feature of iterable) {
featureClass.features.push({ ...feature, id: feature.properties?.id ?? i });
i += 1;
}
setData(featureClass);
}
useEffect(() => {
map.once("load", loadData);
map.on("moveend", loadData);
return () => {
map.off("moveend", loadData);
};
}, []);
return (
<>{children}</>
)
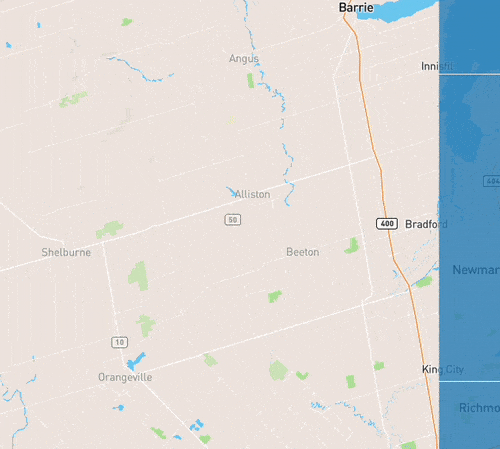
}If you go back to the DemoMap.jsx component, and replace the GeoJSON Source component provided by react-map-gl with this FlatgeobufSource.jsx component, you should see something like the following:
This is fine and you can leave here, but we can go a bit further: Instead of waiting for the map to finish moving to start streaming the data, we should make the map start to stream as it’s moving.
Step 9: Use a Better Trigger
So instead of using the moveend trigger, we’re going to use the move map lifecycle event. But we don’t want to use every move event. To have the function invoke each tick as the map is in motion would be bad. Instead, we are going to throttle it so that the loadData takes effect only each n milliseconds using the throttle function provided by lodash.
Start by installing the library:
$ npm i lodash.throttleNow we are ready to set up the throttle function. Try inserting this logic into the FlatgeobufSource.jsx component in what you perceive to be the appropriate place.
// components/FlatgeobufSource.jsx
import throttle from 'lodash.throttle'
// ...
const timeDelayMilliseconds = 900
const throttledLoadData = throttle(loadData, timeDelayMilliseconds, { trailing: true });
map.once("load", loadData);
map.on("move", throttledLoadData);
return () => {
map.off("move", throttledLoadData);
};
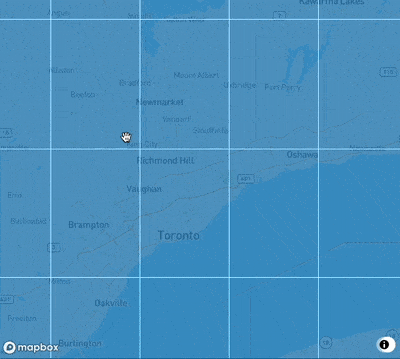
// ...In doing this, the map feels a lot less klunky:
That’s it. We have a React component that will allow you to use flatgeobuf in react-map-gl. In using a single file, you\’re reducing the amount of work or infrastructure required to maintain your map. You can try the results below: